
This article, and the typewriter repair I enacted, is a matter of devotion to tools of craft and heritage. So it is the first linked posting to my new social media author page, created to adapt to a policy change.
I’m posting this online because actual repair experience is one of the best home teachers, and if one more wonderful Hermes 3000 stays ticking, so much the better for the words coming through it. Articles that helped me in this process:
http://offountainpenstypewriters.blogspot.com/2012/05/this-is-rounded-bocy-hermes-3000-taken.html
http://typewriter.boardhost.com/viewtopic.php?id=2524
http://site.xavier.edu/polt/typewriters/hermes3000.pdf
Here’s the story of how it got injured:
https://bonesofstarlight.com/2018/08/31/typewriter-repair/
The luck of it was where it hit the ground – on the one part of the cover case that has plenty of space between it and the actual typewriter, where it bends over the keys. The mechanisms took a shock, but not a direct impact.
The trouble:

Replace: platen = carriage.
The space bar would shudder as I moved the carriage back and forth. It felt like, and was, a gear problem. In my search string I called it a spacing problem.
… the bars are in the light, not on the paper.
–
First, a list of every little tool I used during this journey of discovery. This was further than I’d ever taken apart my typewriter before. I made use of toolsets that drew from various arts I practice, including collage, sculpture, jewelry, and general home improvement. I also bought a few things new, like the simple long screwdriver, headlamp, & 3-part oil. This repair kit could give a decent chance of success.
X-Acto knife
curved clay pick
toothpicks
cardstock
cotton swabs
Barge cement glue
brown paper towels
street sweeper tie
9″ 3/16 flathead screwdriver
2″ masking tape (for screws)
scrap paper
toothbrush
stiff-bristle auto detailing brush
hot water for cleaning
leather hole punch
leather-cutting scissors
headlamp
stacks of my own books & sheet foam for stand (can use even stacks of cut 2×4)
pen for notes
3-in-1 Oil
6-pc precision screwdriver set (3/32″ & 1/16″)
needlenose inside-grip tweezers
a pillow
–
THE REPAIR
I’ll go picture-by-picture. Before I embarked on this, I laboriously typed one more sentence onto my book manuscript so that if the typewriter never properly typed again, that would be the last thing it did.

I removed the carriage.

This was the only apparent gearing mechanism that seemed as though it could be the culprit. As I went along I removed the ancient dusty crud in the typewriter by swabbing surfaces with a clean, dry Q-tip (eraser shavings? tiny fibers? so this had been used well, after all). This was actually my first time removing the carriage.

I used my screwdriver to rotate these tabs, and the carriage lifted out. I used the advice of an article to slightly depress the position-locking buttons on the sides of the carriage while doing it.

Not knowing precisely how this was going to go, I undid the front screws on the upper housing (one is visible between 3 and 4). This ended up being an advanced step for later.

To get better access and views into this gearing component, I removed this separation plate. 2 screws. I kept track of my screws by placing them head-down in their oriented positions on a flat loop of masking tape on the table, with each pair of screws labeled to its origin. All pairs were tiny but distinctly different.


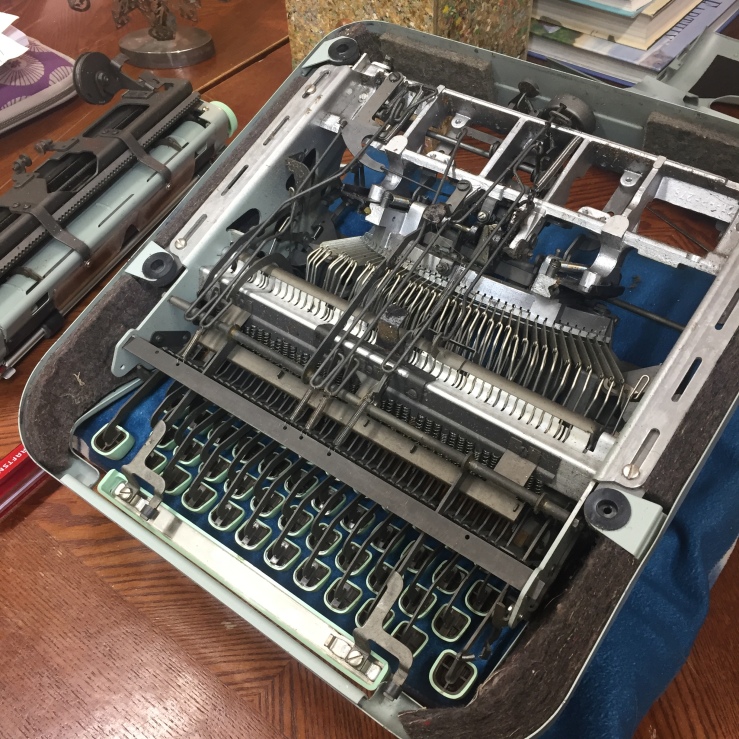
Peering in. Made the decision to get the covers off so I could view from below and all possible angles. Had never fully taken the covers off before, only the feet.

I positioned upside-down on a pillow that would cradle it while I set to.
Here with the feet removed, placed around the screw tape in orientation, as you can see in the upper right corner. Don’t use that kind of metal bristle brush, I didn’t list it because when I used it to clean off the underside of the ribbon cover it left faint scratching. Use the stiff plastic bristles instead.
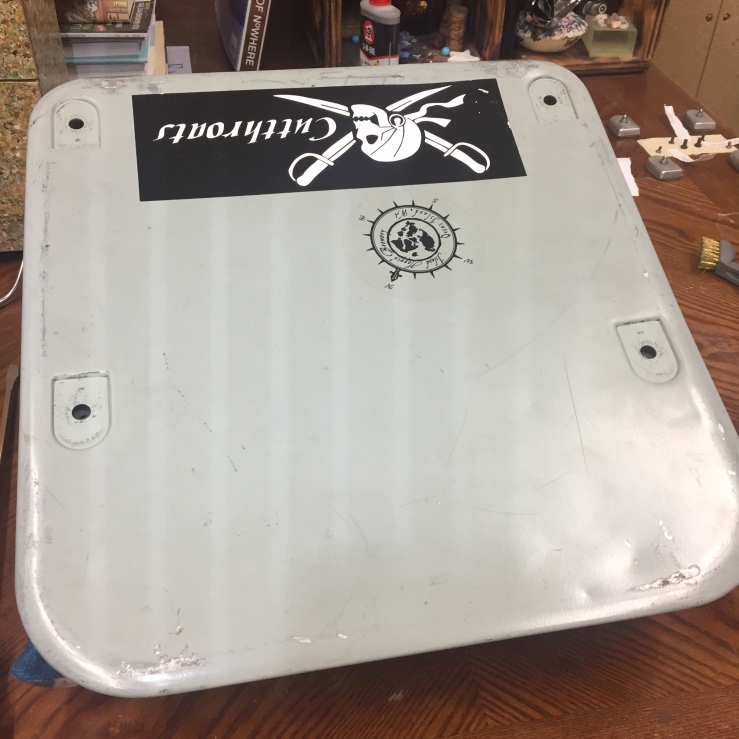
Yes – I put stickers on my Hermes 3000, so that if we ever became tragically separated, someone might be able to divine the clues to its true home. In these islands (San Juan Islands), where that brewery is located (Island Hoppin’), the Cutthroat Pirates are known (but are on San Juan Island not Orcas Island), and if the typewriter can come to them, it can come back to me. In theory.
Bottom removed, unlatching it from the space key. Innards still braced inside housing.

The bottom inside in dirty condition, before brushing off the dirt, and cleaning off what looks like a little mouse piddle with a q-tip dipped into some freshly boiled water (avoiding unecessary use of strong solvents). This was in someone’s aunt’s attic before it came to me via the etsy marketplace, for a very reasonable price at half current typewriter shop retail, in completely working condition. I, too, became someone’s aunt since acquiring this. I’ve had Tris, this particular Hermes 3000, for five years already as my sole typewriter, and at this point had typedited two full novels with me.
Foreshadowing: the cutout in the padding showed that someone else had done the same kind of careful repair that I was doing now.

Here’s my screwtape.

I happened to have new copies of my newest edition of the first volume of the trilogy on hand, and it was the best thing I could find in studio to create two level blocks with space in between. I kept them nice with this foam sheet packaging. I normally choose more eco-friendly packaging in my life, but this roll of foam has served many purposes.
The space between the block stands meant that I could reach up from underneath while I looked in from above. This was when I realized that the problem had gone away, and the gear & teeth were operating smoothly with appropriate spacing. I could move the gear with my thumb, and it sounded like the easy clicking I’m used to, and the space bar didn’t shudder.
From seeing what had been pressing on what and clicking against what in there as I tested that moving gear during each stage, there was a lever pushing on a tooth that was shutting a necessary miniscule gap and interfering with the gear. The lever was pushing on the tooth because of pressure on its elbow from the bottom cover, which was bowing increasingly with age.
The problem hadn’t much to do with the knock it took, except that it had popped the bow of the bottom cover up just a fraction of a millimeter more. I pressed the elbow up and created the problem. I stopped pressing it and the problem was no more.

Looking at the felt padding inside the bottom again, I traced any mechanical impressions worn into it, and located the spot that corresponded to placement of the guilty elbow. There was a newer, faint, not-too-deep impression there to match. I poked four dots around this impression, the corners of the patch of padding I would excise.
… similar to the patch excised already!
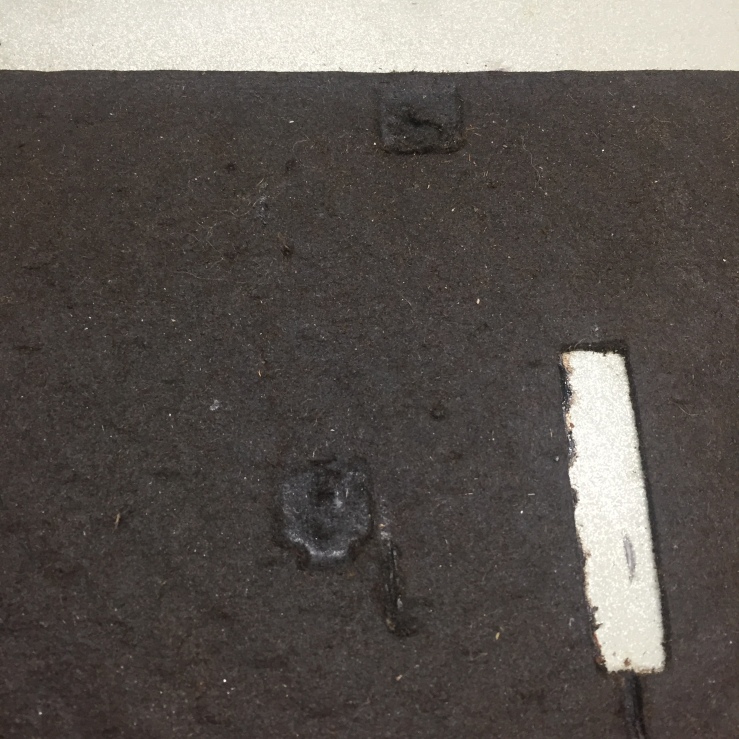
Four dots, upper left-ish.

Patch cut by X-Acto & pried up with clay tool. Glued in a piece of cardstock to add a minimized protective layer, using Barge cement glue which can be pried up.
(There was a power outage when I started this article and the lights just came back on when I got to this part!)


Feeling happy & hopeful, I took a moment to photograph the inside with a refraction viewer I had just picked up for a quarter. You can see that I had replaced the separation plate inside now that the problem in the gears had vanished. There were a couple other things to address on the way to reassembly.

The two screws from the front of the housing (remember those?) had once had a sort of threaded plastic double-washer. One had fully fragmented, and crumbled when I took off the housing, unable to be pieced back together. When I assessed what sort of gasketing material I could use to replace the washer effect, I noticed that the patch I had cut out from the padding was of appropriate thickness, and there was exactly enough to create two washers to align inside and outside the lacking hole, and they were already still-sticky with ancient glue on one side.
I could probably find a tiny washer of the right size in metal or plastic at the hardware store, but this needed to be put back together on this night if possible so that I could confirm my repair, or return to despair.
I used my leather hole punch to cut a nice hole just slightly smaller in diameter than the screw threading, and left the corners square so they’d rest around the larger hole that they sandwiched.

There they stick. Ew, that looks dirty…


Doesn’t that look dirty? I cleaned it with more hot water & cotton swabs.

Housing back on, with inner footing tabs still retracted to allow it back on. Innards mostly still floating but housing centered around formatting keys.

Ribbon cover snapped back on, since I would be turning it over to reattach the base.

Put the base back on, and the moment of truth arrived. The fix worked! It worked, and worked, and worked. I listened to long sections of smooth, unobstructed clicks. Upper left there, below the key arms, you can see slightly out-of-focus the lever elbow with the opened patch beneath, room to operate freely once more.
One last explanatory look at the mechanism.

That’s the gear that was being obstructed. See the hooked tooth hovering above the left side of it?

There’s the lever point that was pushing down on the hooked tooth plate, and when the gear grinded past the hooked tooth, it shook the lever, which was ultimately connected to the space bar. The space key pushes the tooth down, which pushes the gear, which moves the carriage by one space.
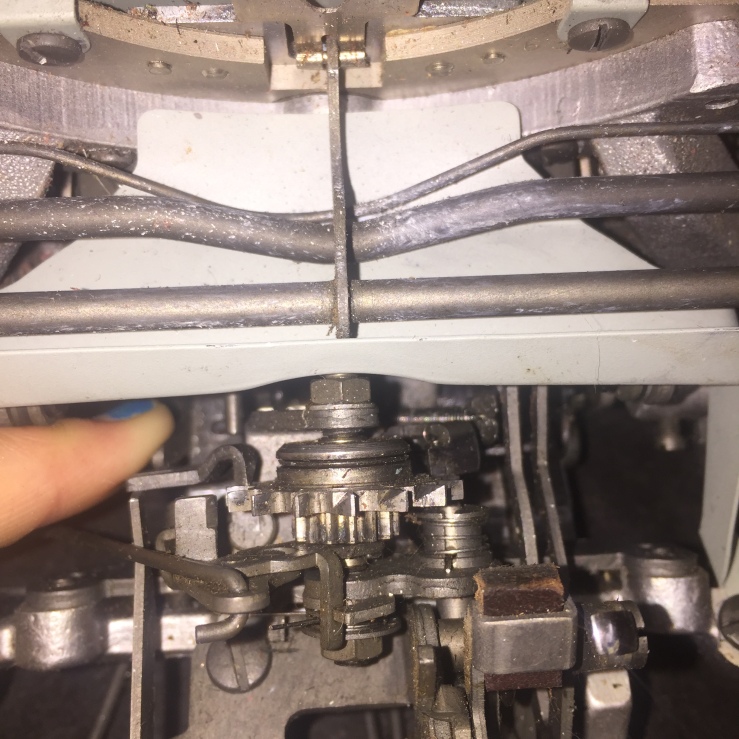
There’s the lever pushing the tooth down, erasing the gap that should be there.

And there is the gap between the tooth and the gear as it should rest!
While I was doing all this, I saw that the right margin indicator ribbon had gotten stuck outside of the casing, leaving the spring inside a little overstretched as it couldn’t pull the indicator ribbon back in, which left an amount of loose ribbon slack waving around inside the carriage when the right margin was adjusted but the indicator didn’t retract with it.
Pretty sure it had been this way since I got it, and I just used the rubber slider to indicate my right margin set. I was simply reminded of something I’d essentially forgotten while in the course of repair, and now I didn’t like seeing the way the extra ribbon just lay around inside a toothy moving part (the carriage). I sort of remember thinking about fixing the margin ribbon, when I peered around in it close to when I’d first gotten it and the carriage retracting line had fouled its spool.
The tab that normally kept the ribbon in was keeping it out.

That’s the corner tab. The top of two screws was stuck tight. Before all of this taking apart, I put WD40 on a swab and touched it around the screw and let it sink in, but that didn’t work to loosen it. So I got the 3-in-1, more viscous, more old-fashioned, and when I swabbed that around the screw and let it sink in, it worked.

Right margin corner tab removed, now the bars just rest against each other where they meet.


See where the margin ribbon is stuck askew outside its tube casing? That end of the spring got overextended, but the rest is still tightly coiled so the spring is still good. I jimmied the metal end cap of the ribbon back in with little tools.

Snap! Working again as intended!

While replacing the two front housing screws, the other plastic washer gasket crumbled too. Actually, it crumbled while putting the housing back on with the new padding gasket on the other side. The best other other appropriate gasket material I had in-house was the foam lettering I use in my mixed-media collage series, Passengers (this is a sort of unrelated creative counterpart that fuels my trilogy writing by balancing creative engines).
I got this ml-thick foam lettering when my truck broke down by the town where my ex-romance’s sister lived. She let me tow my truck to her house, where we hung out with her mom and kids, and I helped her with her husband’s overtime work. He does sandblasting etching on gravestones, and this was a huge batch of foam stencils for veteran grave markers that needed to have all the little letters picked out of them. I kept a double-handful of one-side-sticky letter fill that would otherwise have been thrown away. I determined I had enough of these letters to use them in the art series that I would make alongside during the time of writing the fantasy space opera trilogy, Bones of Starlight. I have a little more than enough of them to spare a meager few to error or other usage.
The one of these I could find that would both grip the edges of the larger hole and the edges of the screw (so that the screw wouldn’t sink into the housing) was the ampersand. So the other front screw gasket on the right is an ampersand, that somewhere is etched into a veteran’s grave marker.
My father’s father was a veteran, a Philippine Army doctor in WWII during Japanese occupation. I never met him. My mother’s mother’s female partner, who helped raise my mother, is a veteran of the WWII guerrilla resistance in the Philippines. I am first-generation US-American, like my mother’s father who was born in the US from Irish immigrants before going to the Philippines during the open passage period of American occupation.
Like I said, I can probably find nice tiny plastic washers at the hardware store that could hold it all together more securely, and I might do that at some point for the health of the machine. But this worked.
Tris, my Hermes 3000, is put back together and doing great. It typed the rest of the second book manuscript, Bones of Starlight: Abyss Surrounding, now complete and in print production.
